What I like most about it is that it was free!!

So when I saw a Freecycle offer for paving stone, I jumped on it and got it!! It has taken me all summer to finally get it completed as it is in the hottest part of the gardens, and I just had to wait until it got cooler to finish this labor intensive project. This is what the area looked like after we started getting the plants out of the area. I had always had a mulched path to get through that area, but after doing no gardening for so many years it got all over grown with plants.

Thanks to several Freecycle offers I got it cleared enough to reestablish the path, with the help of so many of you who came to take the plants in the path area. With the new path stones, it was just a question of what to do with them.

This was the first opportunity in a long time to flex my creative muscles and have some fun creating a new path! I decided to put the stones in and then plant thyme throughout the area. Okay, so you know how it goes. I decide on something, and then it turns the tables on me and totally changes the whole thing around.

So my son in law gave me a truck load full of what he thought was loam, and I got it placed into the area, after my DH got the path lined with wood.
I had been using the dirt for fill in the gardens, and thought it was heavy when I went to use in for the path. Not until my DH did some for me did we finally come to the realization that it was not loam, but clay. By that time I had gotten the whole area filled with the soil in preparation for the final stages of placing the stone and planting the plants! Not so fast ---- the soil was not at all suitable for planting anything in it. So change of plans, I decided to use a heavy mulch to suppress all weeds/seeds and then fill in around the stones with crushed stone left over from work on the house. As I was trying to get this done without spending any money, I decided to recycle things around here for the project. I found old carpeting, carpet padding, fabric, cardboard and even newspapers just right for the job.
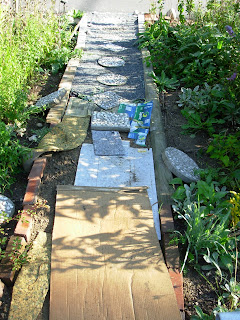
This was my process. I filled the path part way full of the clay soil,

then put the components of my layers to keep any weeds, etc from growing up through the path.

I started with some old carpeting, then used carpet padding,

and when that ran out switched to layering with heavy cardboard


and newspapers,

all the while carving out the shape of the stones, so they would fit into the depression created.

Then I spread a non natural fabric the full length before placing the stones on top.

After the stones were secure I filled it all in with the crushed stone.

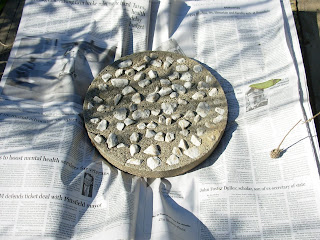
Mia and I started working on placing decorative stones and some shells for an artistic accent.
That will take some time to complete as we are just so busy with other things right now. Did find out that some of the shells we were using are just too brittle, so are sticking with the durable ones only!!
And this is the finished path!


3 comments:
It is amazing to see the complete transformation from when i first went in the early spring to now it is amazing how much it changed. The path really looks great now!!
Thanks, Krissy. There have certainly been lots of changes around these gardens this season. Wait til you see the other changes coming in future posts!!
Very nice!
Post a Comment